VersaWorks – Setting up the Queues
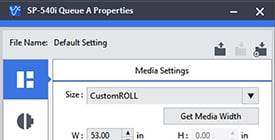
Queue A & B (and C, D, E in RVW6) allow presets to be assigned to newly loaded files. This process can save time and establish consistant output. Each Queue can be setup for a particular type of workflow or media type. Most of these settings can be changed after a file is loaded as well.
SETTINGS THAT MATTER:
Many settings are obvious (copies, scale, profiles, tiling, Print vs Print/Cut), but a few are either overlooked or misunderstood. This is not an exhaustive list of settings, but those that need to be commonly set on all(most) queues. Use these suggestions initially until they are fully understood before altering. These will be addressed by TAB from top to bottom.
QUALITY: Set the profile to the profile and quality that will be used most often. i.e. Roland GCVP, etc. The current suggestion for TrueVis Machines is to set Color Mangement (at the bottom of the tab) to the True Rich Color (or True Rich Color 2) preset. Older machines will benefit from setting to Max Impact – but change the default RGB target to Adobe1998 – This will change the preset to Custom. For CMYK only machine – check the Preserve Primary Colors box ON. This feature will force the rendering algorythm to clear other CMYK components when they are zeroed out. This helps with gray rendering [0,0,0,50] and yellow [0,0,100,0]. Often the RGB matching method should be changed to Perceptual if RGB files are typically photographs.
FILE FORMAT: EPS Margin – set this to 0.05″ – this expands the loaded EPS files edge space so that cut lines don’t get clipped where the cutline overlaps the edge.
USE SPOT COLORS: Check this box ON – this setting allows for Spot Colors to be targeted for color assignment based on the color charts in the EDIT-SPOT COLOR menu – bypassing the vagueries of color correction algorhythms. Roland Color Sytem Library & Pantone Libraries are the most common used spot color libraries. Check the Use Special Colors box to ON – this will only be needed if the Special Colors function is used.
PRINTER CONTROLS: Set FEED CALIBRATION CONTROLS, OTHER CONTROLS, & HEATER CONTROLS to “Use Printer Settings.” These settings keep RVW from over-riding the settings on the printer.
CLIP & TILE: set the OVERLAP: TYPE to “Top-Left” and the SIZE to 0.25″ (or the overlap of choice.)
In RVW6 – there is a save as setting at the top of the queue window – save a basic setting and load and change on each succesive queue. Hidden advantage: If you ever need to initialize RVW – you caneasily reload these settings from file.
Many of these settings will be revisited in a future post – going into greater detail.

